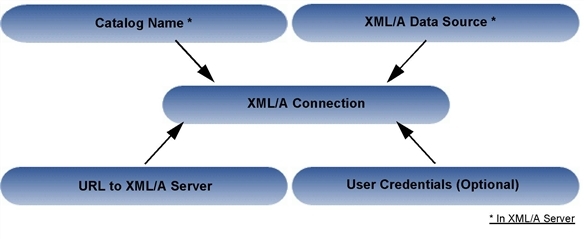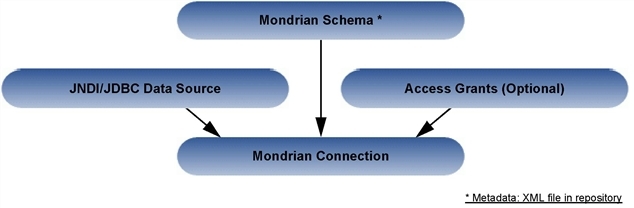
Anatomy of a Mondrian Connection
This section describes basic administration of OLAP views, including:
• Creating an OLAP View with a Mondrian Connection
• Creating an OLAP View with an XML/A Connection
An OLAP view is a collection of multidimensional data that is based on an analysis client connection and an MDX query. It is the entry point to analysis operations, such as slice and dice, drill down, and drill through. Creating a view entails identifying the elements that allow Jaspersoft OLAP to retrieve and secure the data.
|
|
|
Anatomy of a Mondrian Connection |
To create an OLAP view with a local Mondrian connection and an MDX query:
| 1. | At the Getting Started page, click View > Repository. |
The Repository page appears.
| 2. | In the Folders panel, navigate to Organization > Analysis Components > Analysis Views. |
Some user Roles navigate to Organization > Organization > Analysis Components > Analysis Views.
| 3. | Right-click the folder and select Add Resource > OLAP View. |
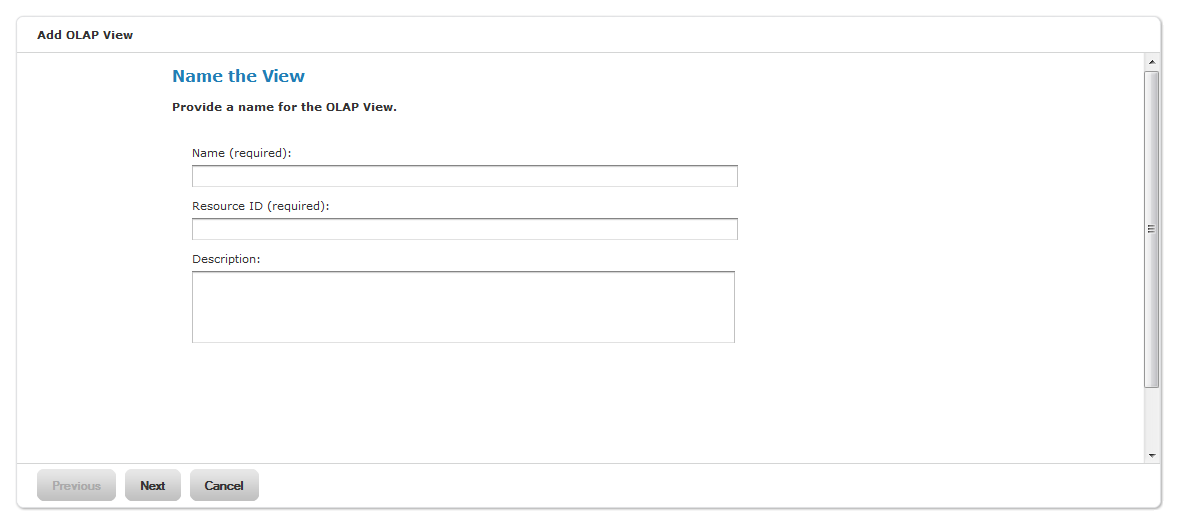
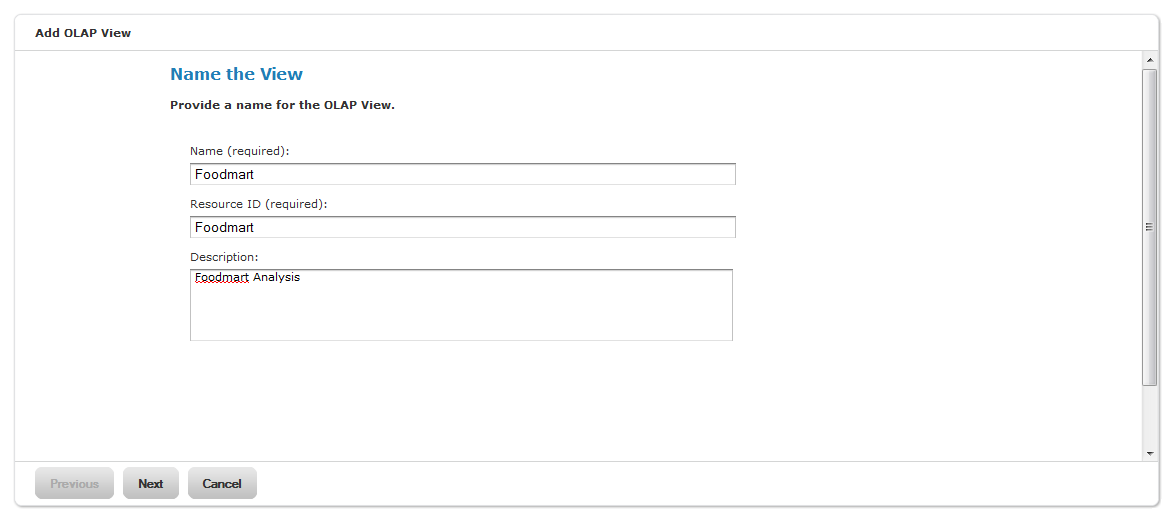
The Name the View window appears, prompting you to provide a name for the new view.
|
|
|
Name the View Window |
| 4. | Enter a name and description for the new view. |
|
|
The Resource ID field is auto-generated from the Name field, and after it is saved, it cannot be changed. |
| 5. | Click Next. |
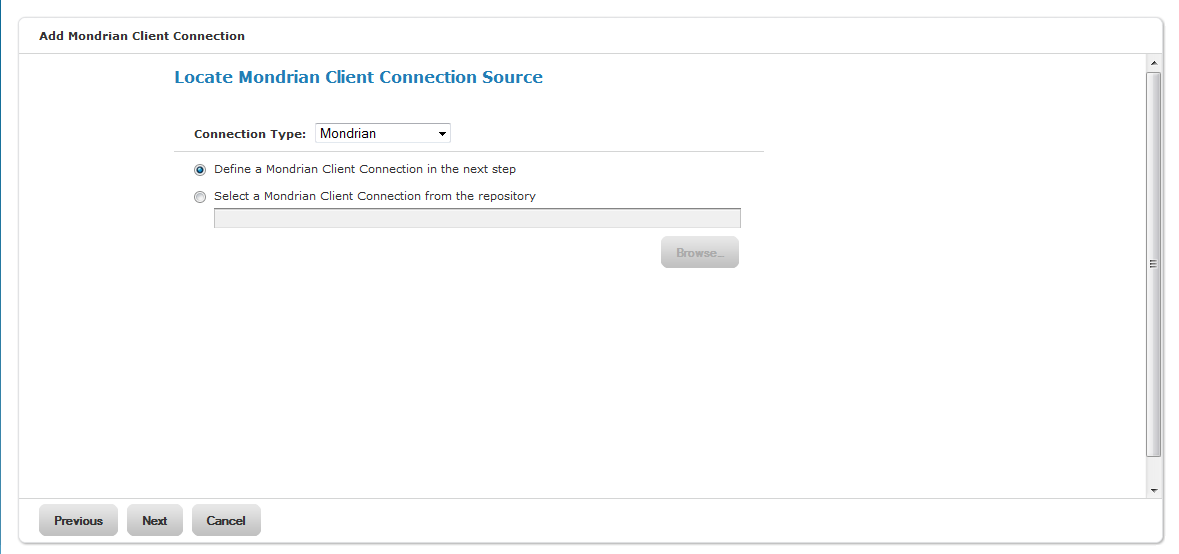
The Locate Mondrian Client Connection Source window appears, prompting you to add a local Mondrian connection.
|
|
|
Locate Mondrian Client Connection Source Window |
| 6. | Click one of the following: |
• Define a Mondrian Client Connection in the next step.
• Select a Mondrian Client Connection from the repository.
Click Browse, drill down to the connection you want, and click Select.
Click Next and skip to step See "Enter the MDX query string, for example,".
| 7. | Click Next. |
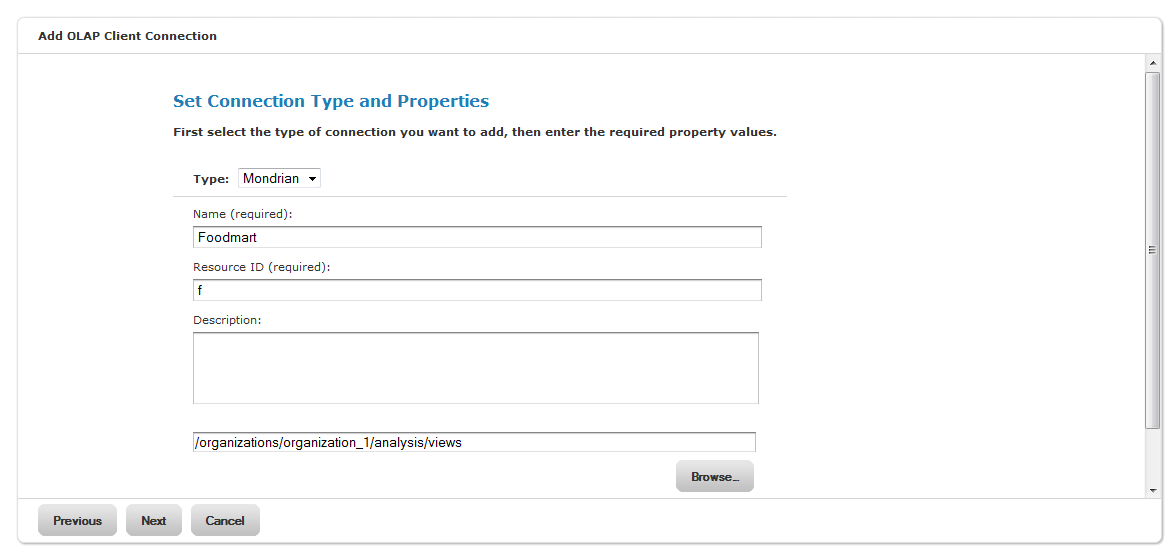
The Set Connection Type and Properties window appears, prompting you to select a connection.
|
|
|
Set Connection Type and Properties Window |
| 8. | Select the connection type in the Type dropdown box, if necessary, and complete the fields. |
To save the connection to a folder, click Browse, drill down to select the location and folder, and then click Select.
| 9. | Click Next. |
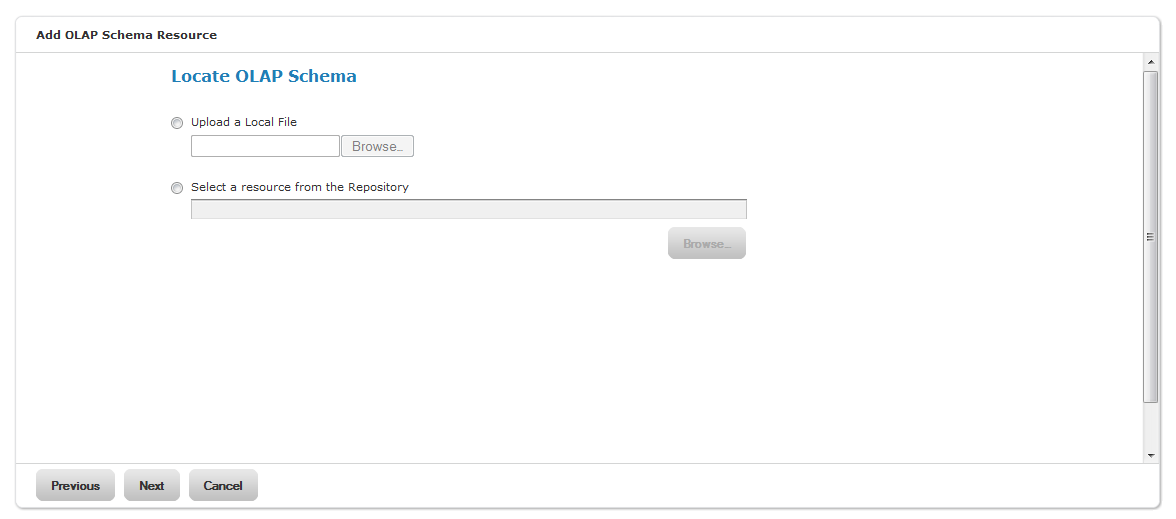
The Locate OLAP Schema window appears, prompting you to upload a resource or select one from the repository.
|
|
|
Locate OLAP Schema Window |
| 10. | Click on one of the following: |
• To select a local file, click Upload a Local File.
Click Browse, drill down to select the file you want and then click Select.
• To select an existing source, click Select a resource from the Repository.
Click Browse, drill down to select the schema, and then click Select.
| 11. | Click Next. |
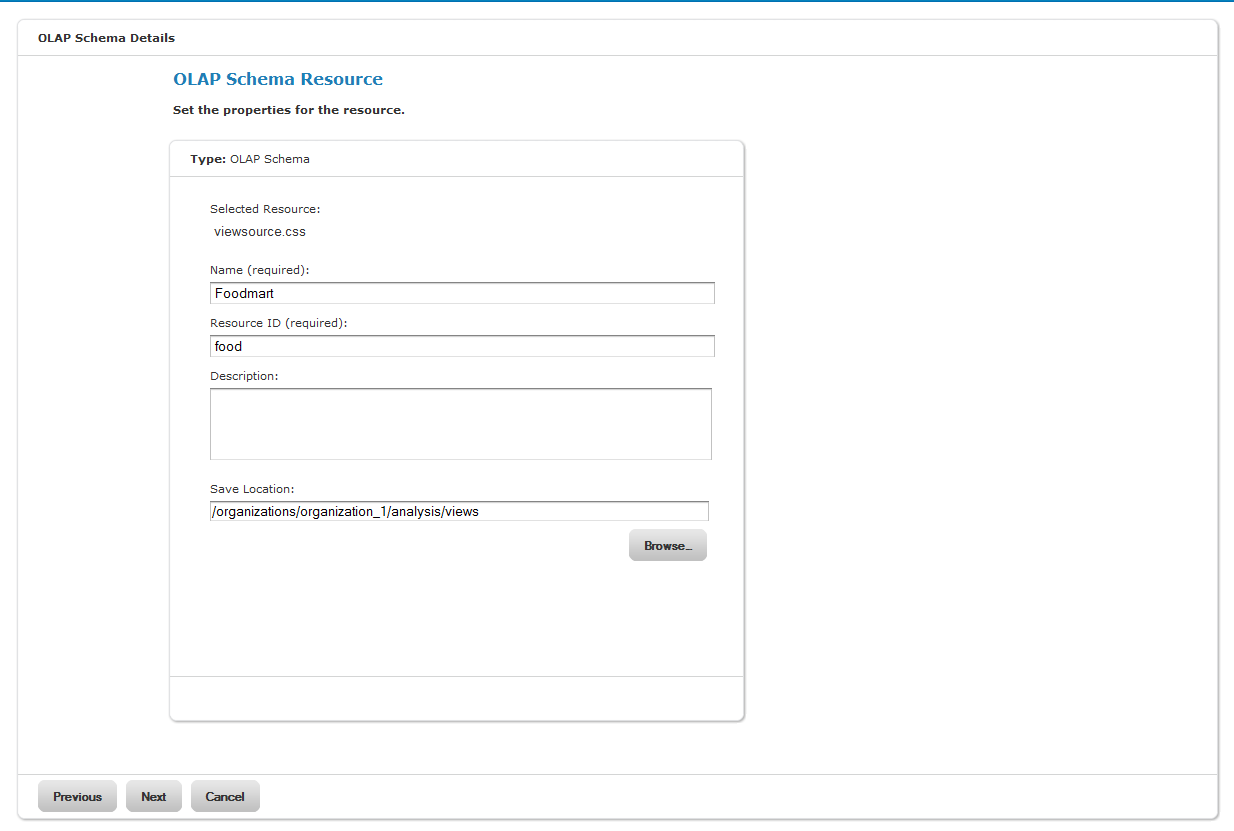
The OLAP Schema Resource windows appears, prompting you to set the properties of the resource.
|
|
|
OLAP Schema Resource Window |
| 12. | Complete or change the current input in the fields. |
• In the File will be added to field, click Browse, drill down to the location to which you want to add the file, and then click Select.
|
|
If you selected an existing source in See "Click on one of the following:", all fields of the OLAP Schema Resource are filled and not editable. |
| 13. | Click Next. |
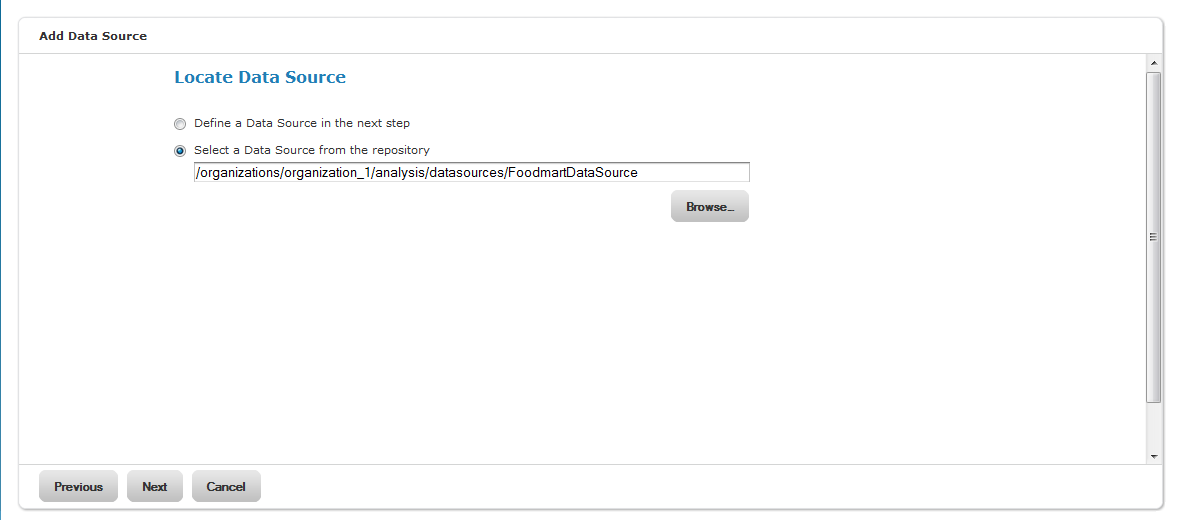
The Locate Data Source window appears, prompting you to select a data source.
|
|
|
Locate Data Source Window |
| 14. | Click one of the following: |
• To add a data source, click Define a Data Source in the next step.
• To select a data source from the Repository, click Select a Data Source from the Repository.
Click Browse, drill down to the location to which you want to add the file, and click Select.
Click Next and skip to See "Click one of the following buttons:".
| 15. | Click Next. |
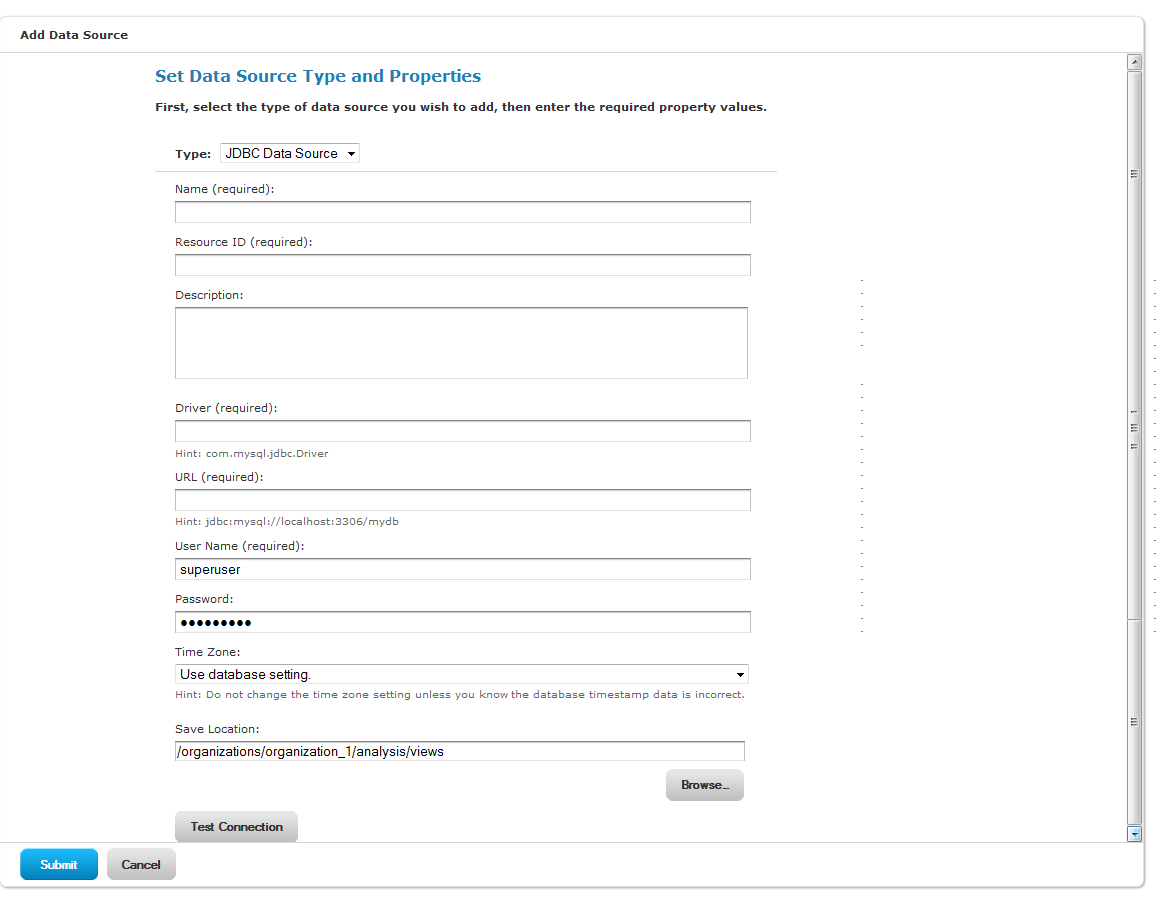
The Set Data Source Type and Properties window appears, prompting you to select a data type and enter the property values.
|
|
|
Set Data Source Type and Properties Window |
| 16. | At the Type field, select the data source type, for example JDBC Data Source. |
The fields change according to the data source you select to enable you to enter the property values.
| 17. | Enter a value in each field as necessary. |
• Click Test Connection to ensure the connection is valid.
A yellow banner appears at the top of the window with the message, Connection successful or Connection failed.
| 18. | Click Submit. |
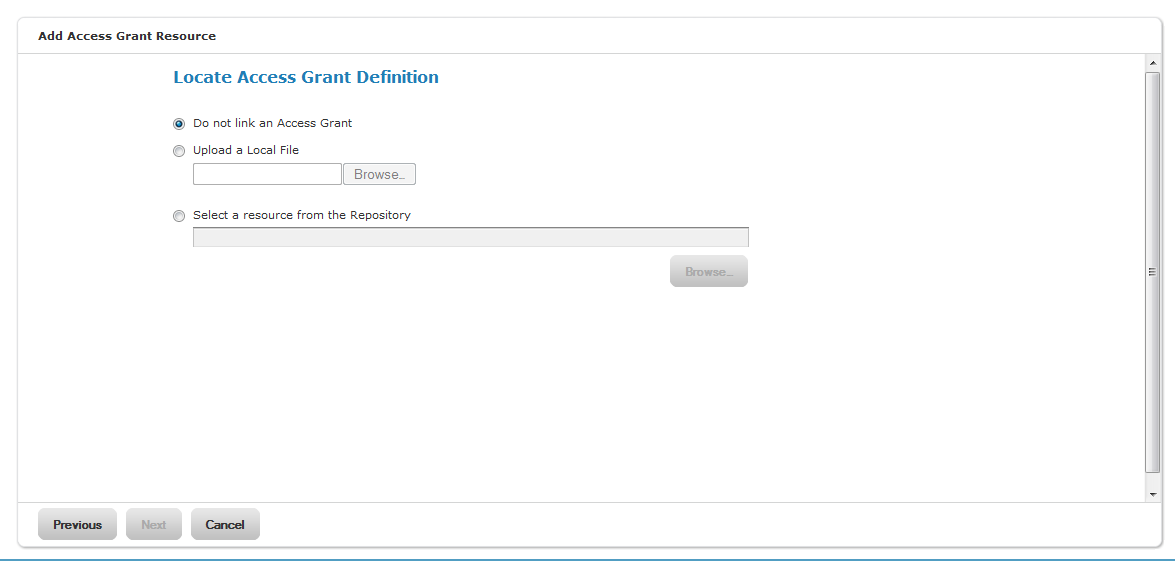
The Locate Access Grant Definition window appears, prompting you to set the properties for the resource.
|
|
|
Locate Access Grant Definition Window |
| 19. | Click one of the following buttons: |
• Do not link an Access Grant.
Click Next and skip to step See "Enter the MDX query string, for example,".
• Upload a Local File.
Click Browse, drill down to the location to which you want to add the file, and then click Select.
• Select a resource from the Repository.
Click Browse, drill down to the location to which you want to add the file, and then click Select.
| 20. | Click Next. |
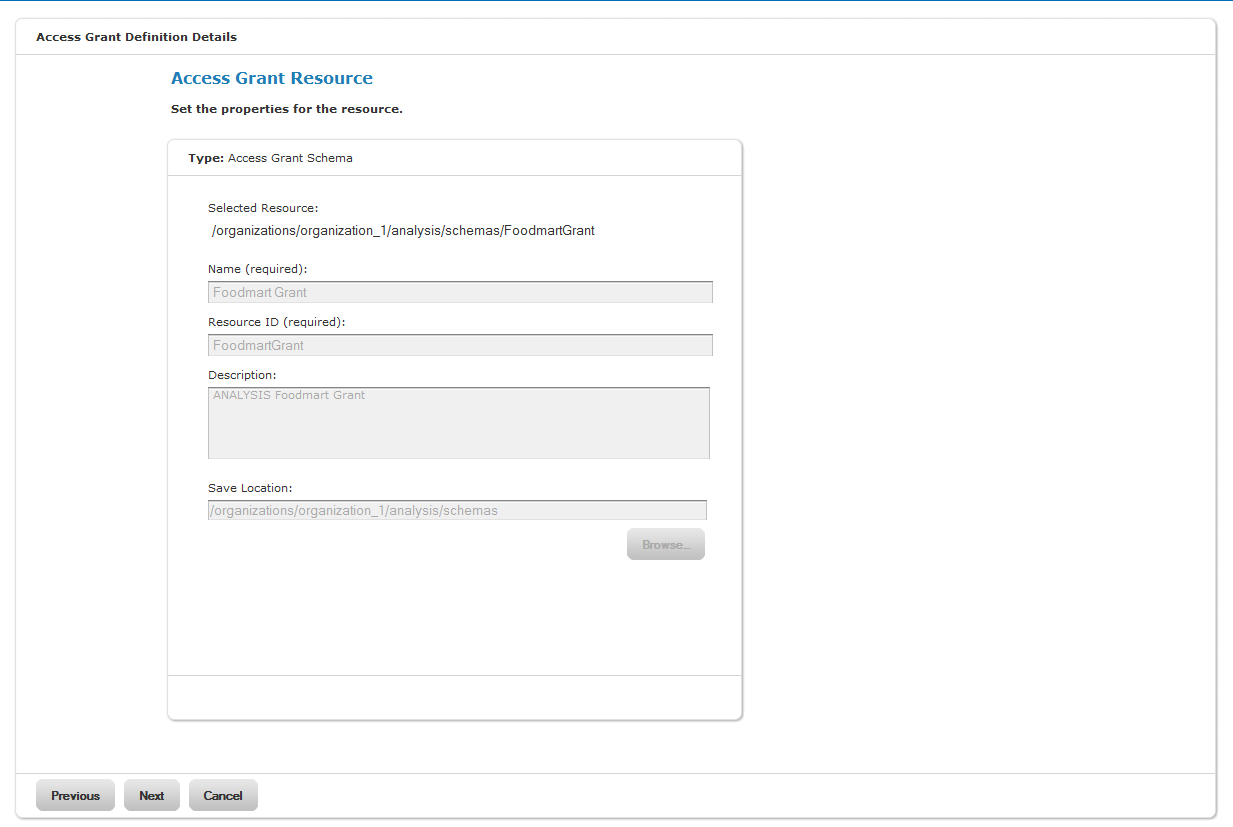
The Access Grant Resource window appears.
,
|
|
|
Access Grant Resource Window |
| 21. | If you uploaded a file in See "Click one of the following buttons:", complete the fields and click Next. |
If you selected a resource from the Repository, click Next.
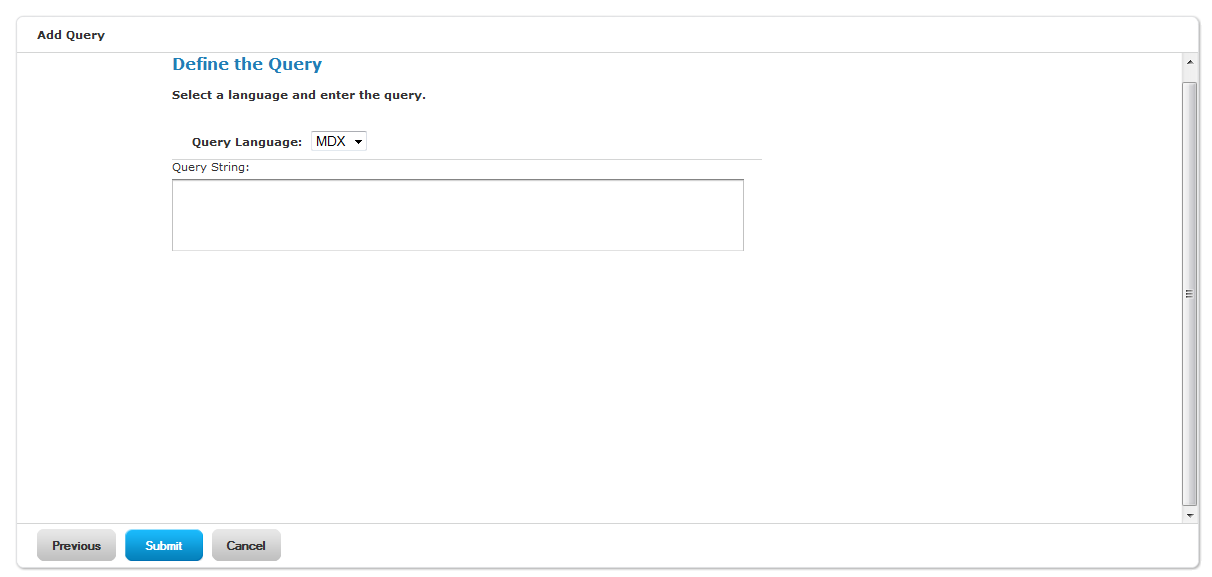
The Define the Query window appears, prompting you for the query string.
|
|
|
Define the Query Window |
| 22. | Enter the MDX query string, for example, |
| 23. | Click Submit. |
The new view is added to the Repository.
|
|
|
Anatomy of an XML/A Connection |
An XML/A connection is a connection to a remote XML/A client connection. For more information, refer to Performance Tuning.
To create an OLAP view with an XML/A connection:
| 1. | Click View> Repository. |
The Repository appears.
| 2. | In the Folder panel, navigate to Organization > Analysis Components > Analysis Views. |
Some user Roles navigate to Organization > Organization > Analysis Components > Analysis Views.
You can also navigate to xml/a > Add Resource > OLAP View.
| 3. | Right-click the Analysis Views folder and select Add Resource > OLAP View from the context menu. |
The Name the View window appears, prompting you to enter the basic details about the new view.
|
|
|
Name the View Window |
| 4. | Complete the fields and click Next. |
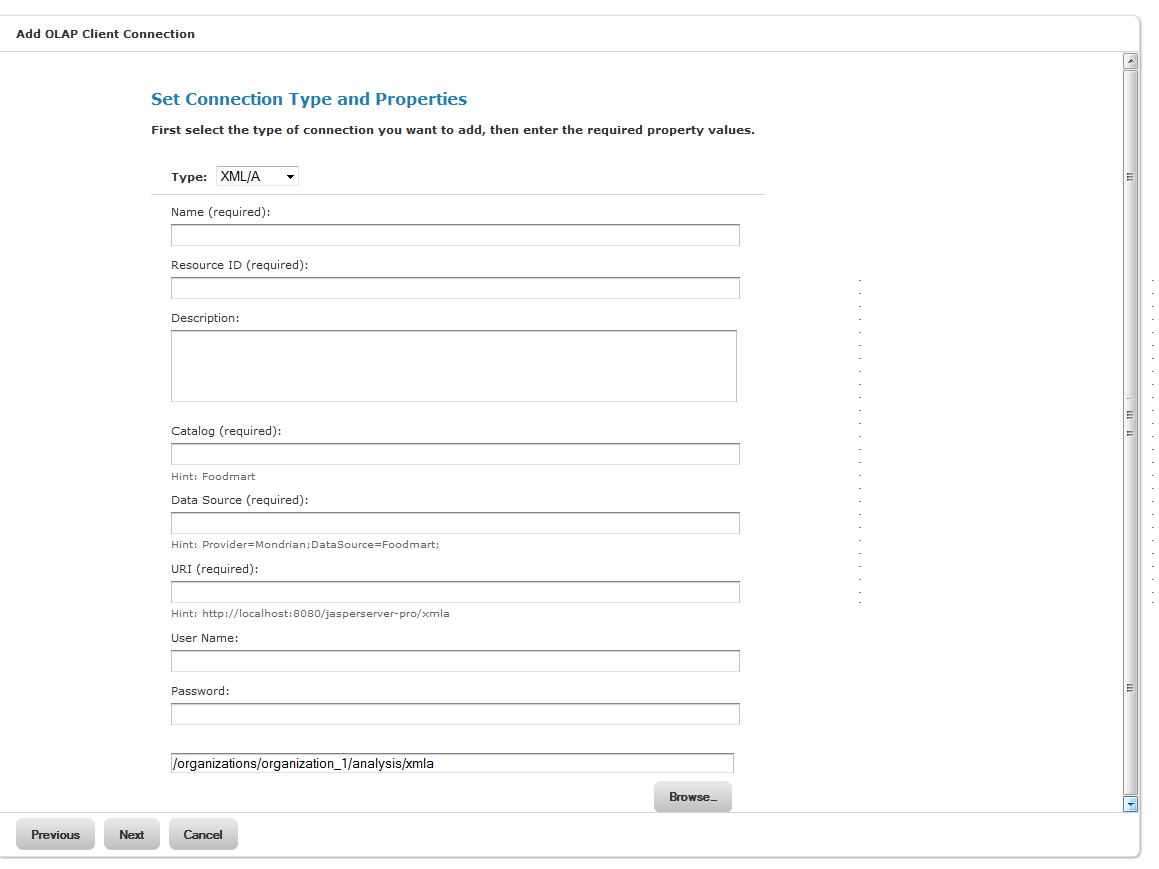
The Set Connection Type and Properties window appears, prompting you to enter basic details about the connection.
|
|
|
Set Connection Type and Properties - XML/A Window |
| 5. | At the Type field, select XML/A from the drop-down box, if necessary, and complete the fields in the window. |
• General details include the name, label, and description of the connection.
• Data options include the catalog, data source, and URI of the data that this connection should return. These details describe data store in your remote JasperReports Server instance.
• Credentials include the name and password Jaspersoft OLAP can pass to the remote Jaspersoft OLAP instance to log in. If this user’s password changes, the connection will fail. You can leave the User Name and Password fields blank, so the logged in user’s credentials are passed to the remote server when the connection is accessed.
| 6. | Click Next. |
The Define the Query window appears, prompting you for a query string.
|
|
|
Define the Query Window |
| 7. | At the Query String field, enter the MDX query string. For example: |
| 8. | Click Submit. |
The XML/A OLAP view appears in the Repository.
To create a schema:
| 1. | Click View> Repository. |
The Repository appears.
| 2. | In the Folder panel, navigate to Organization > Analysis Components > Analysis Schemas. |
| 3. | Right-click the folder and navigate to Add Resource > File > Access Grant Schema or OLAP Schema. |
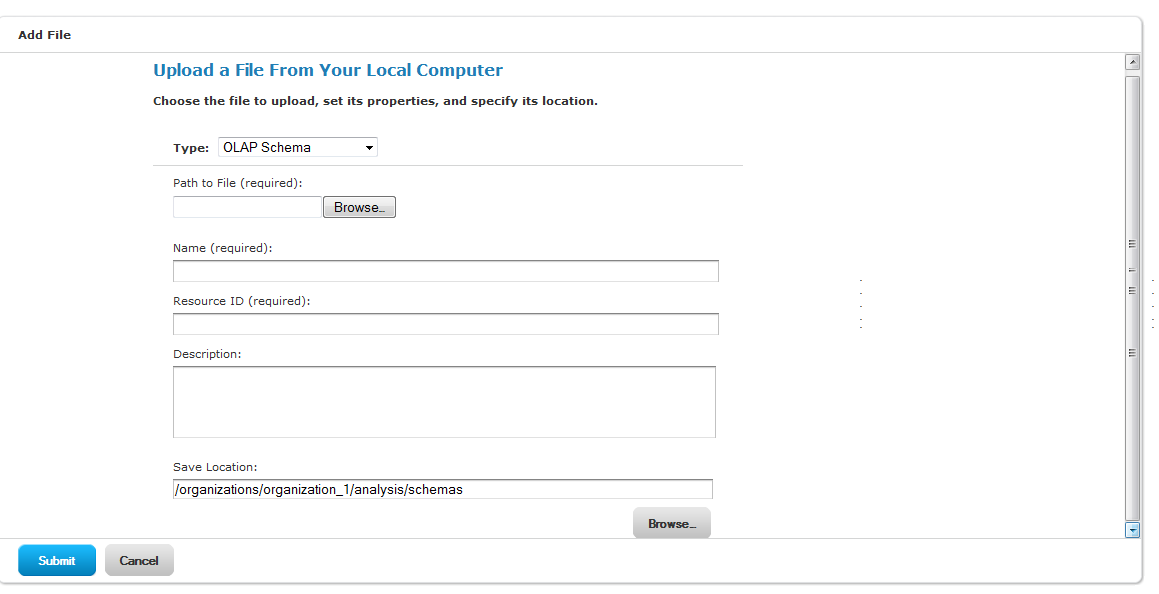
The Upload a File From Your Local Computer window appears, prompting you to select a file and set up the properties.
|
|
To select a different schema, click the Type drop-down box at the top of the window for other options. For example, if Access Schema appears in the drop-down box but you want to create an OLAP schema, click on the down-arrow and select OLAP Schema. |
|
|
|
Upload a File From Your Local Computer Window |
| 4. | At the Path to File field, navigate to the location where you want to add the file and enter a name, resource ID and description in the corresponding fields. |
| 5. | Complete the Name and Resource ID fields. |
| 6. | At the Save Location field, navigate to the location in the Repository where you want the file to reside. |
| 7. | Click Submit. |
The new file appears in the Repository at the location you selected.
To change the naming, connection, or MDX query in an OLAP view:
| 1. | In the Search field in the Repository, enter the name (or partial name) of the OLAP view you want to edit, and click the Search icon. |
For example, enter food.
The Repository appears, displaying the objects that match the text you enter.
| 2. | Right-click the view you want and click Edit. |
|
|
|
Name the View Window |
The Name the View window appears with the fields filled in.
| 3. | Make your changes to the fields as necessary and then click Next. |
If you do not want to make any changes on this window, just click Next.
The Locate Mondrian Client Connection Source window appears.
|
|
|
Locate Mondrian Client Connection Source Window |
| 4. | Click each field you want to change. |
• Click Define a Mondrian Client Connection in the next step to define a new connection.
For more information on completing the fields in the following windows, see See "Creating an OLAP View with a Mondrian Connection".
• At Select a Mondrian Client Connection from the Repository, drill down to the location and then click Next.
| 5. | Change the client connection source and click Next. |
• If you do not want to make any changes on this window, just click Next.
The Define a Query window appears with the query language set at MDX.
|
|
|
Define the (MDX) Query Window |
| 6. | Change or enter a new query string, if necessary. |
|
|
You can also edit a view’s MDX query by modifying the navigation table and saving the view. |
| 7. | Click Submit. |
A message appears indicating that the connection was validated successfully.