File resources are those that the administrator creates by uploading a file. Like other resources in this chapter, file resources are created by administrators so that they can be referenced by Jasper Reports. JasperReports server supports the following files:
|
File Type |
Description |
|
CSS |
Cascading Style Sheet file that helps define the user interface as part of a theme. |
|
Font |
True Type font (.ttf) file to extend the set of fonts available in a report and allow embedding of fonts in the PDF output, if needed (see Fonts). |
|
Image |
Any image format supported by the JVM (Java Virtual Machine), such as JPEG, GIF, and PNG. Images can be referenced in JasperReports, and also in CSS files. |
|
JAR |
Libraries that provide functionality for your reports (see section JAR Files) |
|
JRXML |
The definition of a report in JasperReports’ XML-based report definition language. A JRXML file can be uploaded separately for use in multiple JasperReports. |
|
OLAP Schema |
Defines the data in an OLAP cube, including how to aggregate the dimensions. |
|
Resource Bundle |
A Java .properties file containing key-value pairs for localization of reports (see section Resource Bundles) |
|
Style Template |
A JRTX file containing a style template that can be shared between JasperReports. |
|
XML |
XML file used in Domains and analysis to define data-level security. |
The way in which fonts, JAR files and resource bundles are associated with reports is further explained in the following sections.
The server relies on the JasperReports library as its content rendering engine, which enables it to produce high-quality, pixel-perfect documents. The server can use any fonts that are available to its JVM as logical or physical fonts. This solution is perfect for HTML reports that are stored in the server.
However, when exporting the report to PDF, you may need to take additional steps if the report includes fonts that the PDF viewer doesn’t recognize, or if the report requires fonts that your users do not have on their computers. In this case, you must embed the font in the PDF file itself. To embed a font, you must edit the report’s main JRXML file; the TTF (True Type Font) file that the report references must be available to the server at runtime. One way to ensure that the server has the correct font is to upload it to the repository by creating a file resource. Then, the report can refer to the font’s URI in the repository.
For details about working with fonts and PDF export, refer to the JasperReports documentation.
JasperReports can leverage third-party APIs. When run, reports can make direct API calls to third-party code using JRXML expressions. This provides enormous flexibility for incorporating business logic or other utility code into report generation.
In some cases, you can make the third-party code available to the report generating process by adding the necessary libraries to the server’s application classpath when it is deployed. In other cases, upload the third-party or additional JAR files to the repository by creating a file resource. Then the report can refer to the code by referencing them as additional file resources.
When a single JRXML template is used to generate documents in multiple languages, it needs a resource bundle to accommodate the locale-specific content. If you upload such resource bundles by creating a file resource, your JRXML files can refer to them.
The name of the resource bundle created as a file resource in the repository must have .properties as its file extension. For example, the default resource bundle might be named MyReport.properties, and its French translation MyReport_fr.properties. For more information about resource bundles for reports, refer to the JasperReports Server User Guide.
Administrators should organize file resources into folders in the repository to make them easier to find when creating references.
To add a file resource:
1. Log in as an administrator.
2. Select View Repository and locate the parent folder of the new resource in the left-hand Folders panel.
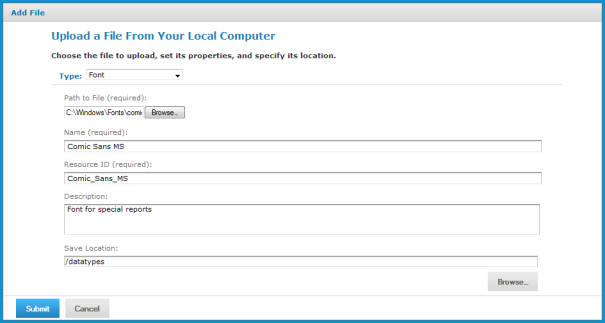
3. In the Folders panel, right-click the parent folder and select Add Resource File from the context menu, then select the type of resource to add. In this example, select Add Resource File Font. The Add File dialog appears.
4. Enter the required information for the file resource. In additions to the name and ID, file resources only require you to enter the path to a file or click Browse to locate a file on your file system.
See "Adding a File Resource" shows the dialog for adding a Font file. All file resources are created by uploading a file in a similar fashion.
|
|
5. When done, click Submit. The new file resource appears in the selected folder in the Repository panel. A message confirming the addition also appears at the top of the page.
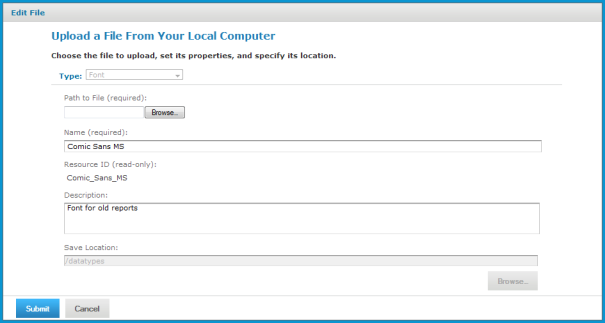
The following example shows how to edit a file resource.
To edit a file resource:
1. Log on as an administrator.
2. In the repository, browse or search for the resource.
3. Right-click the resource and select Edit from the context menu. The Edit File dialog appears much like the Add File dialog except for some properties that cannot be changed. In this example, we edit the font resource created in section Creating a File Resource.
|
|
4. Use the Edit dialog to view or modify the resource definition and its values. See "Editing a File Resource" shows how the Description field was changed. You can also change the contents of the file resource by specifying another file to upload. The Path to File field is not required unless you want to reload the file from disk.
5. Click Submit to save any changes.