![]()
If you log in as a user, you can upload a topic to the server, but this example requires an administrator login to access the JServer Jdbc data source.
When a user clicks Create > Ad Hoc Report on the Home page, the list of Topics on the Topics tab is populated from that location. There are two types of Topics:
• JRXML-based Topics – Created by administrators using iReport and uploaded as JRXML files to the proper location in the repository. Topics are typically of this type.
• Domain Topics – Created from a Domain by administrators using JasperReports Server; for more information see section Creating Topics from Domains.
Either type of Topic is typically an empty report associated with a data source in the server, and then used as a Topic in the Ad Hoc Editor.
To upload a JRXML-based Topic:
| 1. | Log in to the server as administrator and select View > Repository. |
|
|
If you log in as a user, you can upload a topic to the server, but this example requires an administrator login to access the JServer Jdbc data source. |
| 2. | Locate the folder where Topics are stored. The location of the Topics folder depends on your system configuration; by default, Topics are in the Ad Hoc Components > Topics folder. |
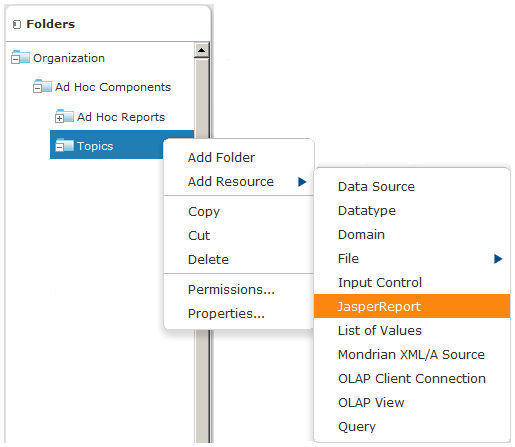
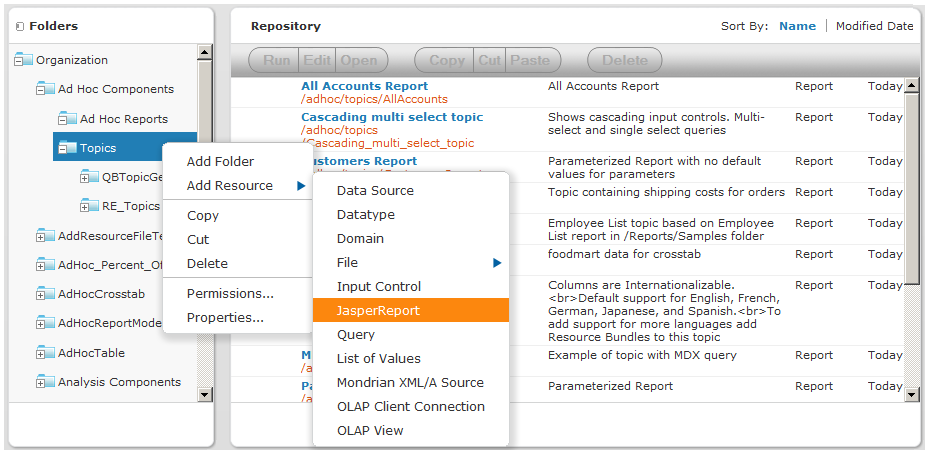
| 3. | Right-click the Topics folder and select Add Resource > JasperReport from the context menu: |
|
|
|
The Add Resource > JasperReport Context Menu |
|
|
Add Resource appears on the context menu only if your login account has write privilege to the folder. |
|
|
After selecting Add Resource > JasperReport, the Set Up the Report page of the JasperReport wizard appears.
| 4. | In the Set Up the Report page, give the Topic a name, a Resource ID, and an optional description, then click Next. |
• The Name field is the visible name of the file in the repository, such as Example Topic.
• The Resource ID field is the internal ID of the object, such as Example_Topic. The server does not accept spaces in an internal ID.
• The Description field, such as Topic uploaded for User Guide example, helps users understand the purpose of the file.
| 5. | In the Add JasperReport page, select Upload a Local File, and click Browse to locate the file and upload the topic from the file system. In this example, the file is <js-install>/samples/adhoc/topics/adhoc_sample.jrxml. |
|
|
To locate adhoc_sample.jrxml, you need access to the server host file system. |
| 6. | Click Data Source. |
|
|
Because this is a simple Topic without parameters, there are no controls and resources associated with this Topic. If the Topic has a parametrized query, you can create input controls for it. SeeCompleting the Complex Report Example. Such input controls can appear in the Ad Hoc Editor and when the report is run. |
| 7. | Choose Select data source from repository, and Browse to locate the data source named Data Sources/JServer Jdbc data source. |
Topics must be associated with the data source that they were designed for.
| 8. | Click Next. In Locate Query, click Submit. |
Topics usually do not need a query or customization, but it is possible to define them.
When you select Create > Ad Hoc Report, the Example Topic appears on the Topics tab of the Data Chooser wizard. If you select the Example Topic, you can create a report using the columns available in the data source selected in See "Choose Select data source from repository, and Browse to locate the data source named Data Sources/JServer Jdbc data source.".
When you create a JRXML file for use as a Topic, you can specify the name to display for each field that the Topic returns. To do so, define a field property named adhoc.display for each field declared in the JRXML. The adhoc.display field property should have the following syntax:
<property name="adhoc.display" value="Any Name"/>
For example, this JRXML code declares a StoreState field that is displayed in reports as Store State:
|
<field name="StoreState" class="java.lang.String"> <property name="adhoc.display" value="Store State"/> </field> |
Topics also support the $R expressions for field names; for more information, see Localizing JRXML Reports.